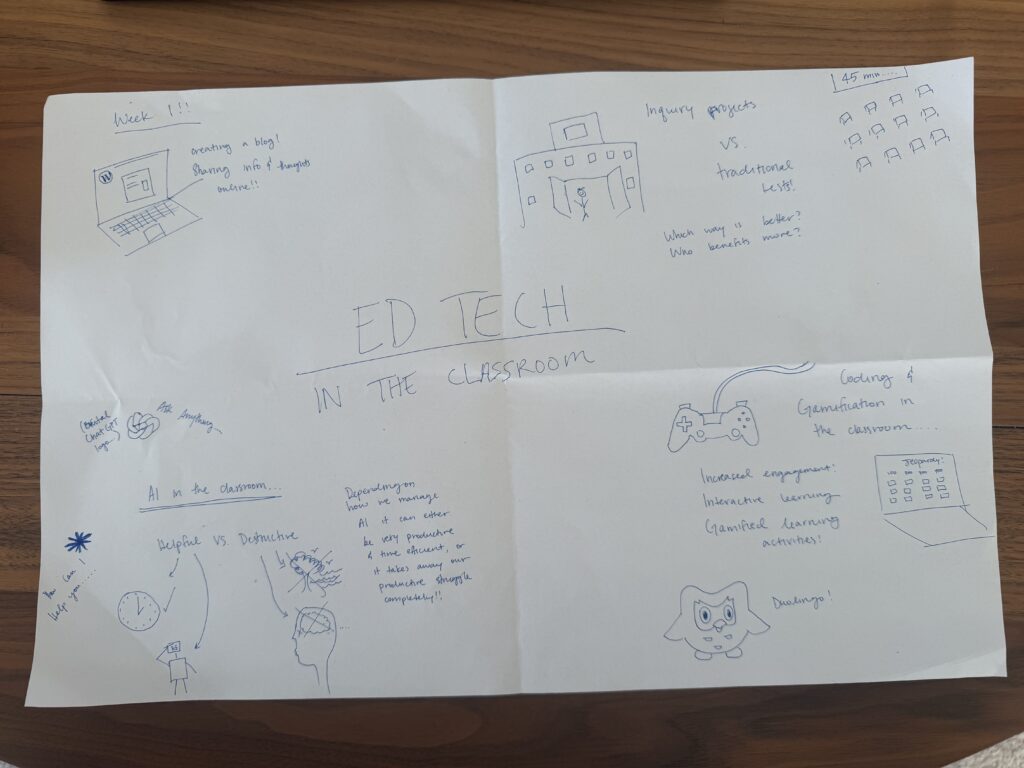
For this sketchnote I just tried to think of topics that stuck with me over the last few weeks in this class. I had fun completing the sketchnote, but I don’t think it is for me. I like to copy sketch’s like from the internet or with something physical in front of me but when it comes to doodling I am not very good (I did indeed look up images to get inspiration for some of the doodles).
I quite loved my inquiry topic. Obviously we as humans spend a lot of time in the kitchen, and when we get busy it is easy to get carried away and lose the spark behind feeding yourself. Nutrition is so important and fuelling your body is not something that should be taken lightly. My advice for anyone deciding on a possible inquiry topic is that they consider topics that infiltrate their life more than one time a week. With cooking, obviously we are in the kitchen at least 3 times a day (bar meal prepping or and dietary restrictions). Doing something repetitive everyday can get so boring but when you have to step out of the box it keeps you interested and then you are able to have a better mentality behind it.
I most enjoyed the outcome of my inquiry topic because it always meant food! I love eating and I have a new found appreciation for chefs or bakers in the kitchen.
I did not use any EdTech tools, as it was all about experimenting in the kitchen which is all hands-on.
Physical and Health Education is usually thought of as a movement-based subject so technology is not always the first thing people associate with it. However, digital tools are starting to play a larger role in supporting learning in PHE classrooms. This inquiry explores how digital platforms can support skill development, student reflection, and student voice in PHE. For example, tools like Hudl or VEO can allow students to record and review their movements in slow motion, helping them analyze skills and improve technique. Technology can also support fitness tracking and goal setting, allowing students to see their progress over time.
Digital platforms such as Flip or Google Classroom can also create space for student reflection through video responses, journals, or exit tickets. This can help students think more deeply about what they learned and how they improved. In addition, tools like Google Forms or choice boards can give students more voice and choice in their learning, which may increase engagement.
At the same time, it is important to consider challenges such as access to technology, privacy concerns, and balancing screen time with physical activity. When used intentionally digital tools can enhance learning while still keeping movement at the center of PHE.
References: Cui, Z., Song, Y., & Du, X. (2024). Multilevel modeling of technology use, student engagement, and fitness outcomes in physical education classes. Frontiers in Psychology, 15. https://doi.org/10.3389/fpsyg.2024.1458899
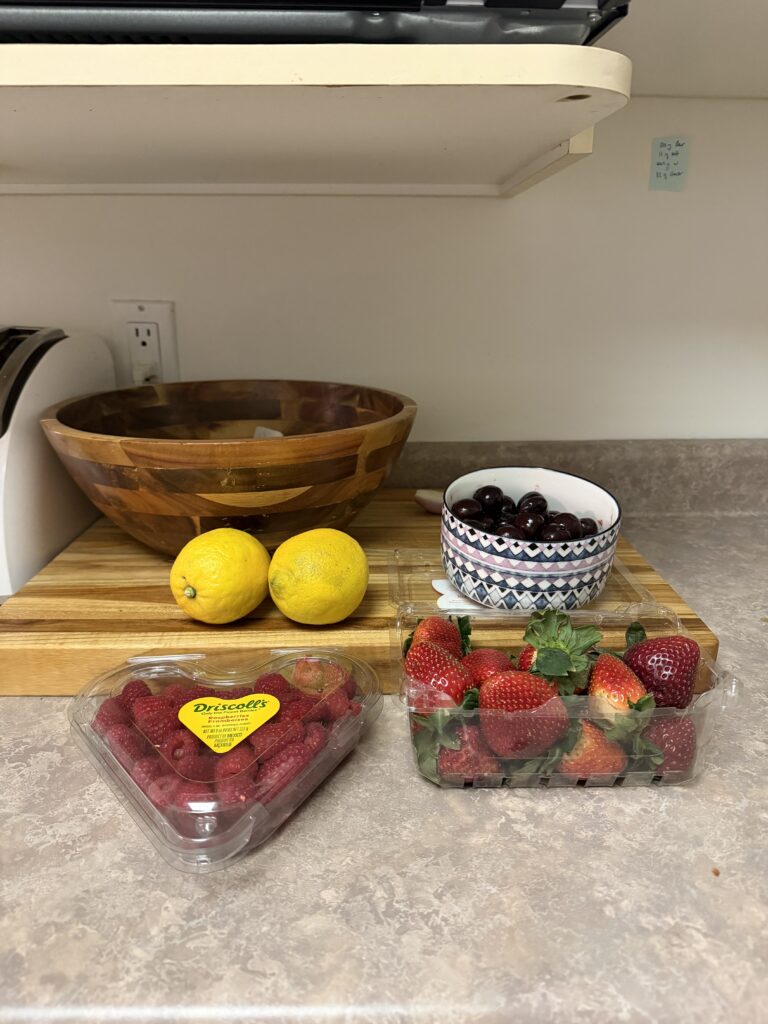
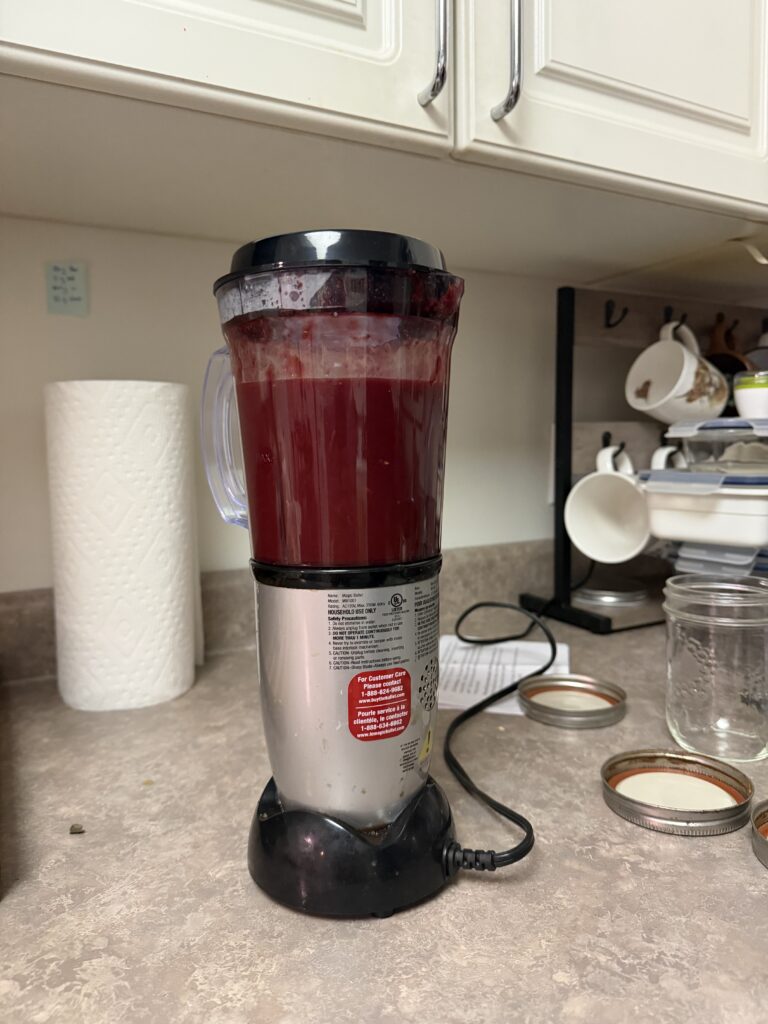
This week I made jam! I followed this reel on instagram for the following.
This recipe requires about 4-5 cups of fruit about 1 cup of sugar (I used brown) and about .5-1 lemon juice
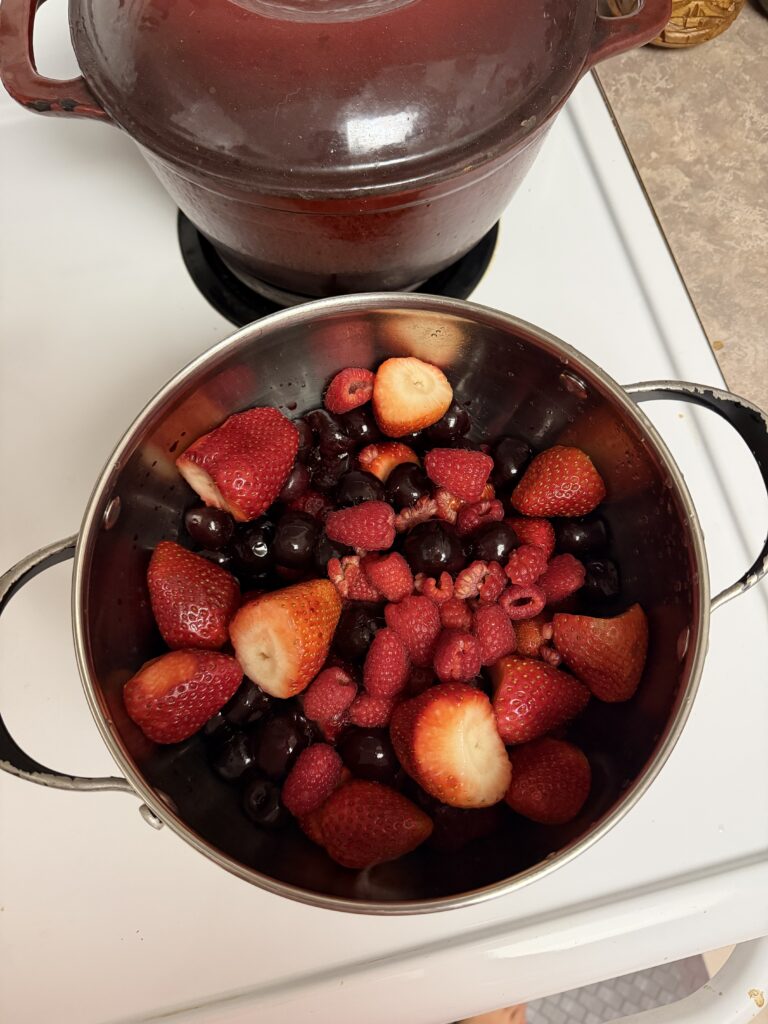
IngredientsBerries in the pot
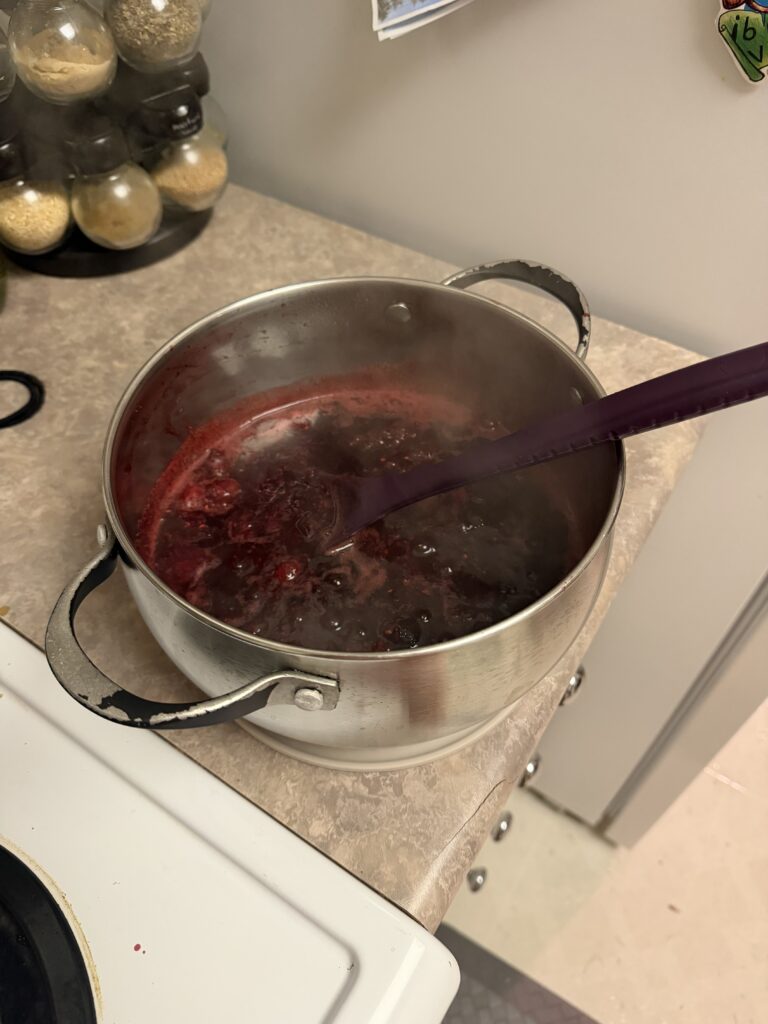
So I threw all the berries, sugar, and lemon juice in the pot, stirred and got it bubbling and boiling, then turned the heat down to low medium. I had to keep stirring frequently for about 20 minutes. The video said the jam was ready when I swiped the back of the spoon with my finger and the jam doesn’t run.
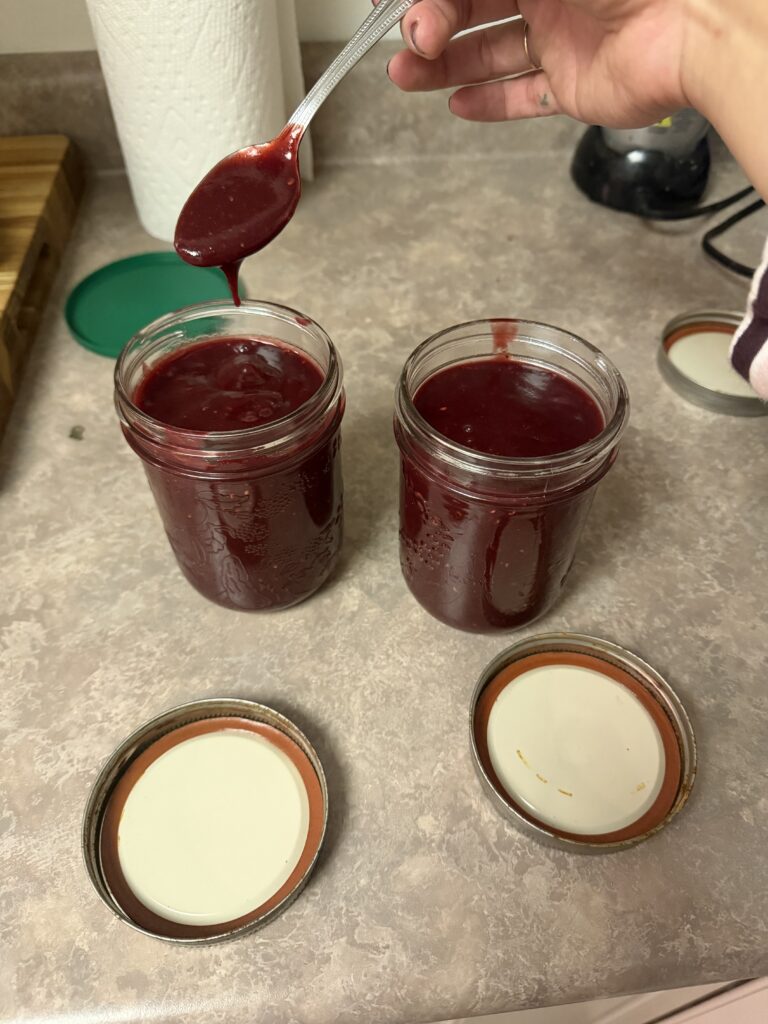
I decided to throw it in the blender after it cooled a bit because I wanted a smooth jam like in the video I was following and I am so blown away by the product. It’s honestly so much tastier than jam you buy at the store, and so easy to make.
Jam concoction simmeringJam product in the blender
I am very happy with how this turned out. A few people asked me if I would use pectin next time and after some research I don’t think so. Even though my jam was not as set/as jelly-like as a traditional jam, from what I have seen online (here is an example) all I need to do is boil it longer so that it removes more water from the fruit. It also seems like pectin ratio depends on the fruit you use and that just seems so complicated for no reason when it’s just as good without.
Since I’m hoping to teach senior math, coding and computational thinking actually make a lot of sense to include. Math is already about breaking problems into steps and thinking logically, which is basically what coding does. I could see coding being a cool way for students to explore patterns, model functions, or run probability simulations instead of just solving things on paper. At the same time, I think it has to be used intentionally. Not every math lesson needs coding, and I wouldn’t want students focusing more on the programming than the actual math ideas. If it’s used in the right spots though, it could help students see math as more practical and connected to real-world problem solving.
Gaming could also be a fun addition to a math class, but I think it works best in small doses. Games can make students more engaged and give them space to experiment with strategies and make mistakes without feeling like they’re being tested. Things like probability games, logic puzzles, or strategy-based challenges could help reinforce math concepts while still feeling interactive. That said, I wouldn’t want gaming to become the main focus of the class. If it feels more like entertainment than learning, the math can get lost. I think games work best as a way to spark interest or reinforce ideas rather than being the primary way content is taught.
Screen recording of my Portuguese Soundboard made by AI tool Claude
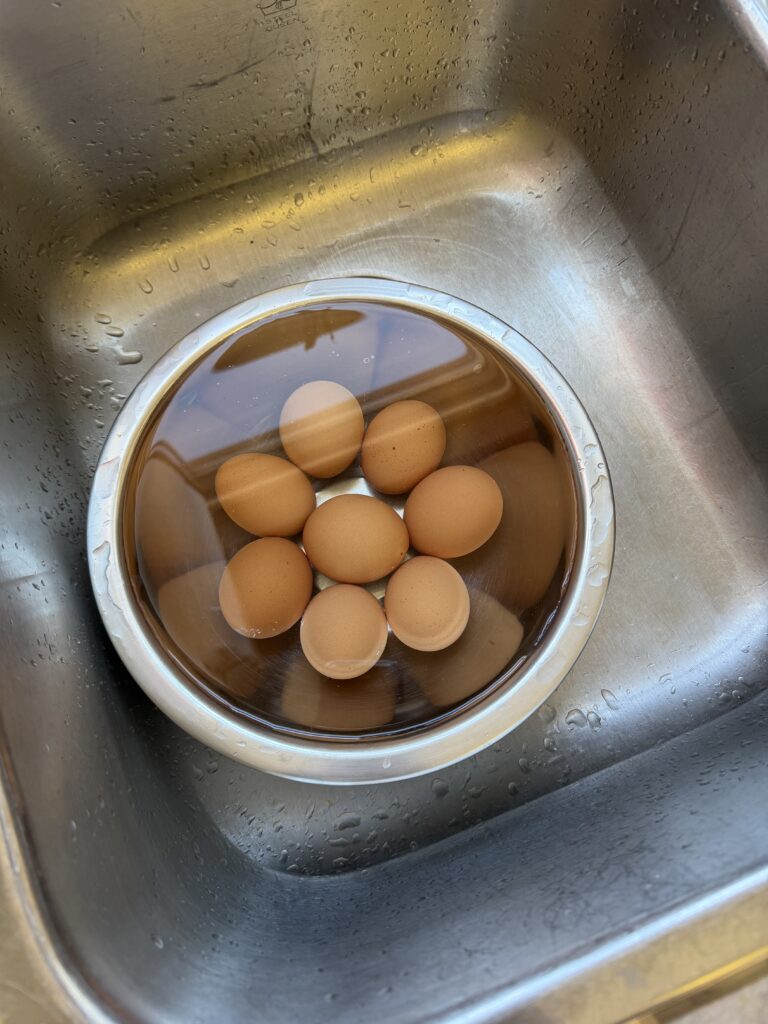
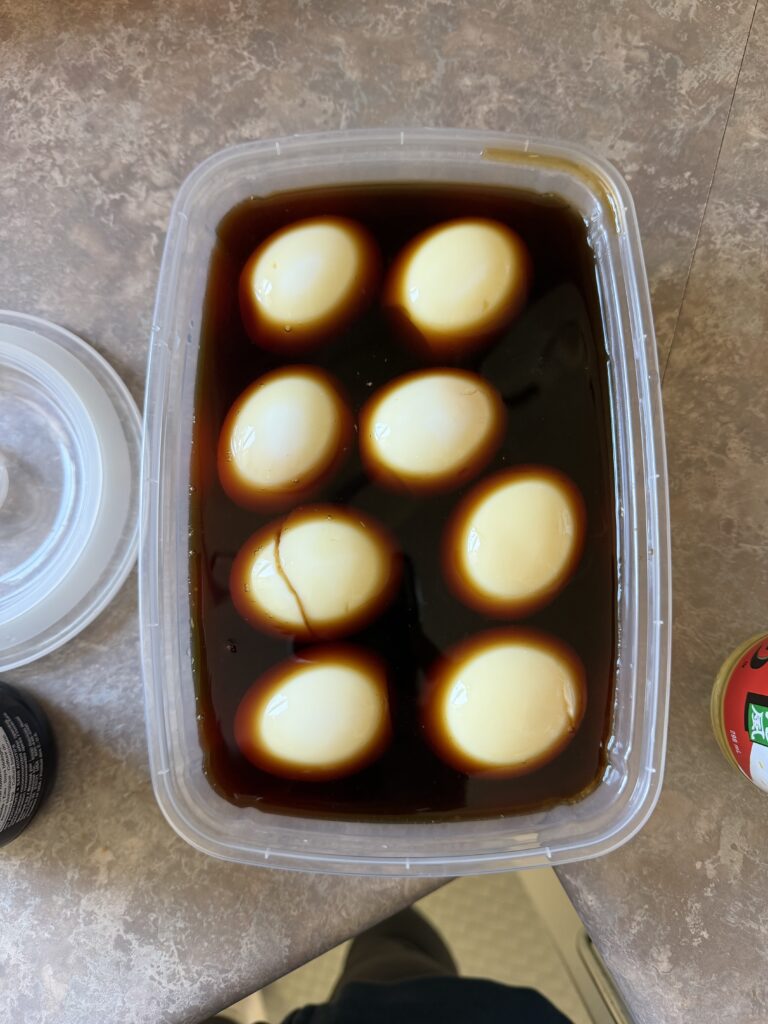
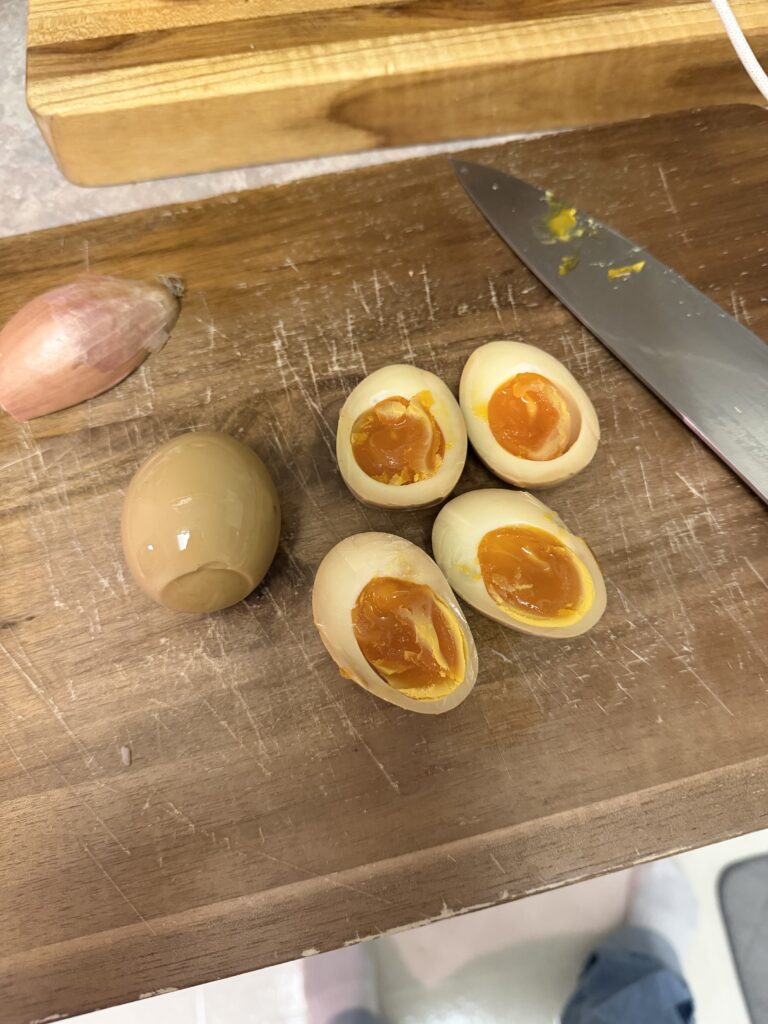
Okay I saw this reel on instagram to marinate your eggs and so I had to do it and make ramen to go with it. Obviously.
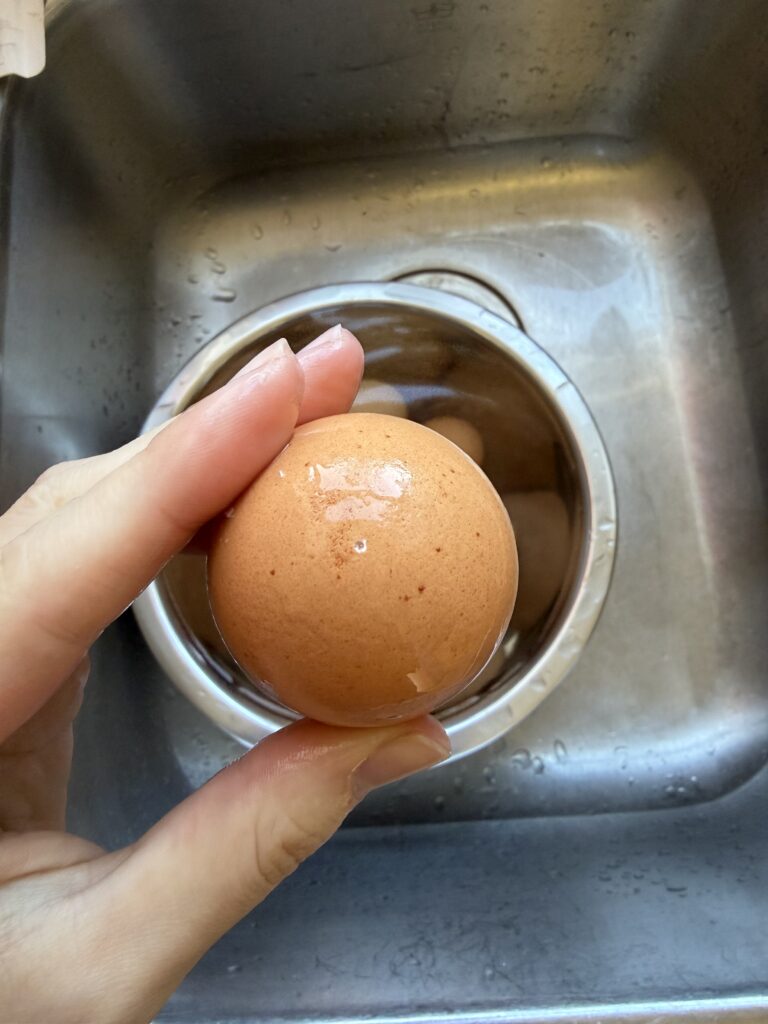
It gave very specific instructions on how to boil your egg for the perfect jammy-ness. Bring the pot to a boil, put the eggs in all at once, leave it on high, after 6:30 mins exactly put the eggs in an ice bath. Also, he suggested I poke a tiny hole in the flatter part of the egg so that it would be easier to peel.
Eggs in a now melted ice bathLittle hole made with a thumb tackEggs in marinating sauce!
After 3 days, I could finally make ramen since I had to wait for the eggs to finish marinating!
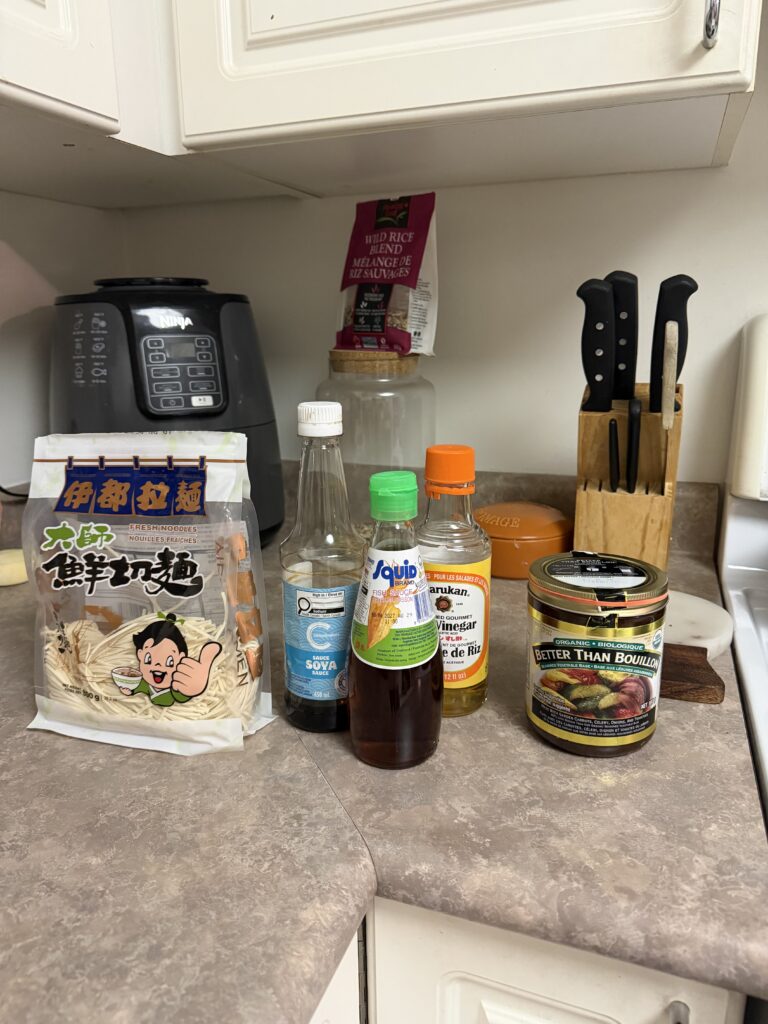
To make the ramen, there was not one specific ramen recipe I could find that looked satisfactory to me. It either looked too boring, too complicated, I didn’t have enough ingredients, or the comments said it tasted bad. So after looking at a few different ones I’ll link herehere and here, I ended up just putting together random ingredients I had that were mentioned in the recipes.
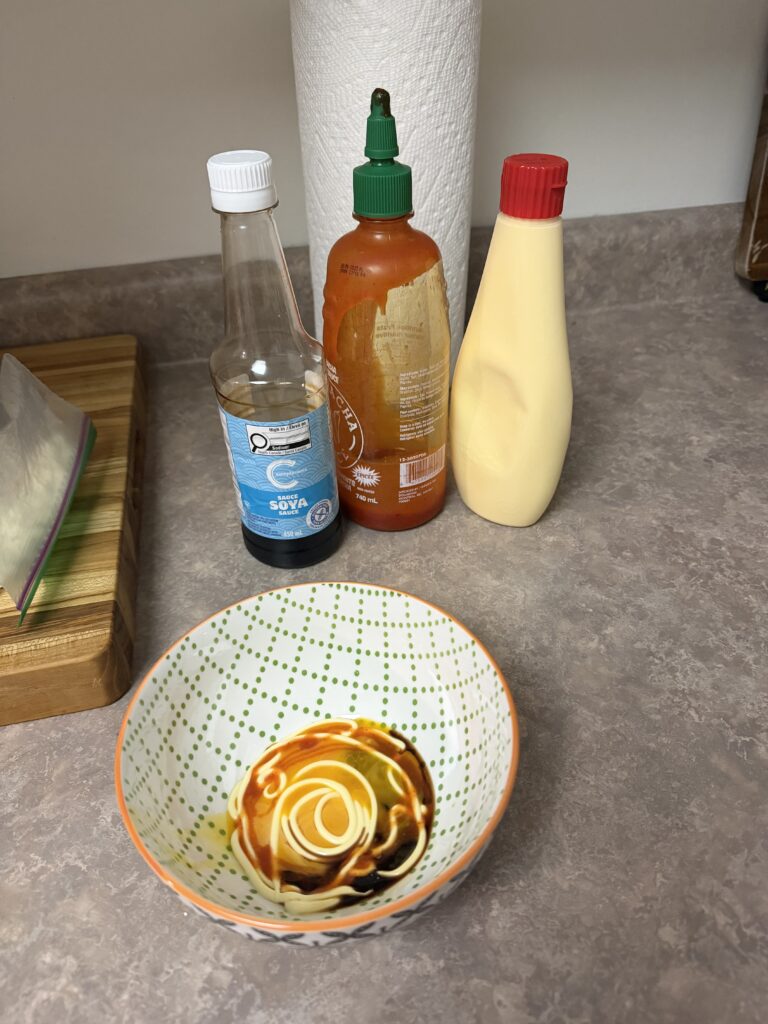
The egg yolk baseThe broth base and noodlesThe marinating sauces
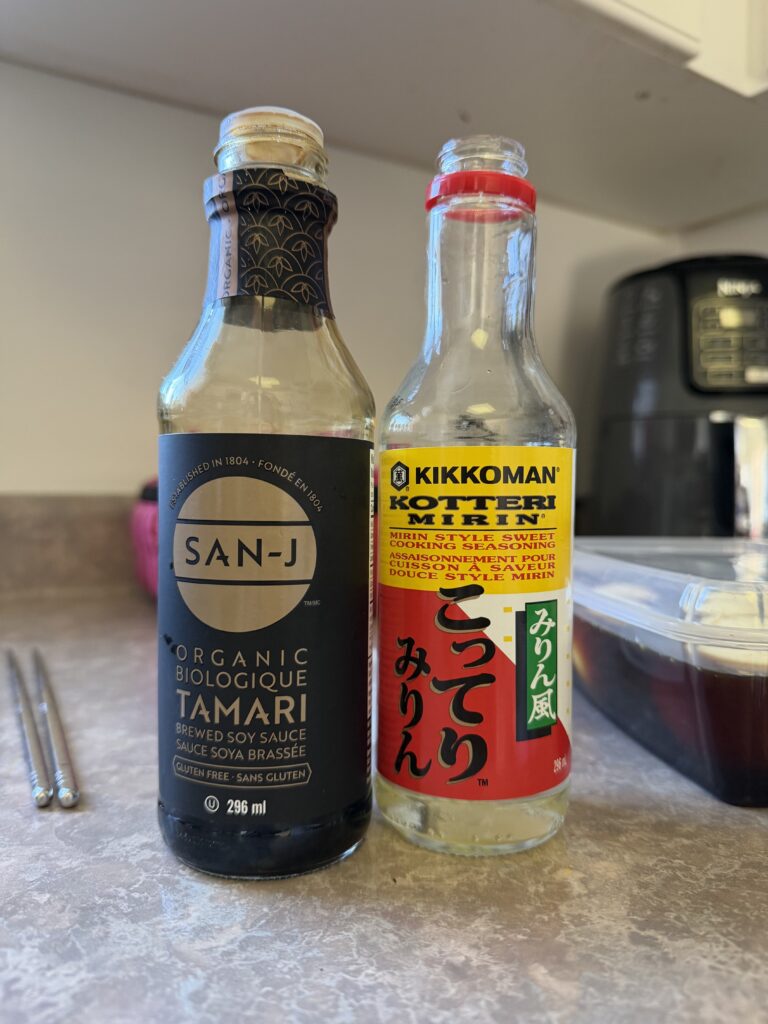
They all mentioned whisking an egg yolk, sriracha, kewpie mayo, and soy sauce together first. Then I made the broth with minced shallot and garlic, veggie stock and added fish sauce, rice vinegar, and more soy sauce. I also ended up adding some miso paste that I had in the fridge.
RAMEN EGGSThe finished ramen topped with green onions
The eggs turned out PERFECTLY (maybe 10 seconds overcooked) and the ramen I would rate it 8/10 which is pretty good for my first time. Next time I would like to try to make tonkatsu ramen (made with pork bones) and maybe experiment with some different ingredients I didn’t have like coconut milk or soy milk or gochujang sauce.
Small Accessibility Practices That Often Get Missed
One thing that stood out to me from the post is how many simple accessibility practices are actually easy to implement but still get missed all the time. Things like adding alt-text to images, using proper headings so screen readers can navigate a page, and making sure links are descriptive instead of just saying “click here” are small things that make a big difference. I know I personally forget about alt-text sometimes when I’m quickly making slides or posting something online. It’s not usually intentional, it’s just not something people automatically think about unless they’ve been taught to design with accessibility in mind.
Why Accessibility Needs to Be Intentional
Another thing that surprised me a bit was how much intentional planning accessibility actually requires.The blog talks about how assistive technologies like screen readers or text-to-speech tools only work well if the digital content is designed properly from the start. That made me realize accessibility isn’t just about adding tools for students later, it’s really about how the material is created in the first place. I think a big reason these practices aren’t more commonly used is simply that many educators haven’t been explicitly shown how to do them. A lot of teachers are using digital tools every day, but accessibility design isn’t always part of that training, so it can easily get overlooked.
This seminar on Student AI Literacy by Cari Wilson gave a really practical overview of how AI is already everywhere and why students need some basic literacy around using it safely and responsibly. She gave this resource, that are some AI lessons and activities that give students baseline understanding. It’s important we don’t just tell them that it’s dangerous and to stop using AI, but instead be realistic since it’s already apart of their lives.
There was a conversation around privacy and she mentioned how her own blog content is now being used to train AI models. It is a good reminder, especially in the digital age we are currently living in, that once something is put online it lives there forever and we lose control of it. That feels especially important for students who don’t always realize how permanent or reusable their digital footprint is. She also showed how you can upload an image into tools like Gemini and ask whether it’s AI generated, which was interesting but also raised questions about accuracy and trust.
The discussion around hallucinations was also pretty concerning. AI can confidently make things up, especially when students ask vague or poorly framed questions, and if students don’t read critically, they might accept incorrect information without questioning it. This is also extremely worry some for deep fakes, and how these tools can be used in cyberbullying and extortion. We need to make sure we help our students learn about these so they are aware about what is out there.
Screenshot taken from Secondary level lesson 7 of the Focused Resources Lesson Plans
This week we had a field trip to the Pacific School of Innovation and Inquiry (PSII) which is an independent high school that does personalized, inquiry-based learning instead of traditional classes. Instead of following set courses and schedules like the rest of their grade, they co-design their oen learning pathways with teachers based on their interests and curiosity. Teachers act as a facilitator of learning and are adapting conditions to fit each learner. The curriculum still agrees with BC’s requirements but is personalized to each student.
The main pedagogy at PSII is inquiry. Students learn through projects instead of lessons and test. The big benefit of this is that learning feels meaningful and personal. This system works really well for those that are highly motivated, independent, and comfortable taking ownership of their own learning.
Some limitations included shorting a student on their social experience. Because the school is small and very individualized, there are no big classes, team sports, and structured peer interaction is not a focus. Some students might also struggle at a school like this without more structure or clear expectations, especially if they need external motivation or routine. I know I would not thrive in a school like this. I thrive off social experiences and am not motivated enough to do well in a school like this.
In theory, PSII is amazing for certain learners. I really respect this model and love how it can really allow some learners to bloom in these classroom settings. I also love how the teachers meet with the students every morning to determine their plan and see where they need to go. Although it’s not for me, I hope they continue to open up more institutions like this for those that need it.
I am using a kitchen scale to measure instead of cups. This is a more reliable and exact way to make sure I have the most control.
I kept the same recipe that my friend uses and just converted it to grams to see if that would make a difference too.
I changed my flour brand. It is still Semola but it’s by a different brand. Seems much finer than the previous so maybe this will turn out better?
I fed my starter twice before using it to bake and when I fed my starter I used a different ratio – 1:10:10 (better to leave for 12 hours according to my research).
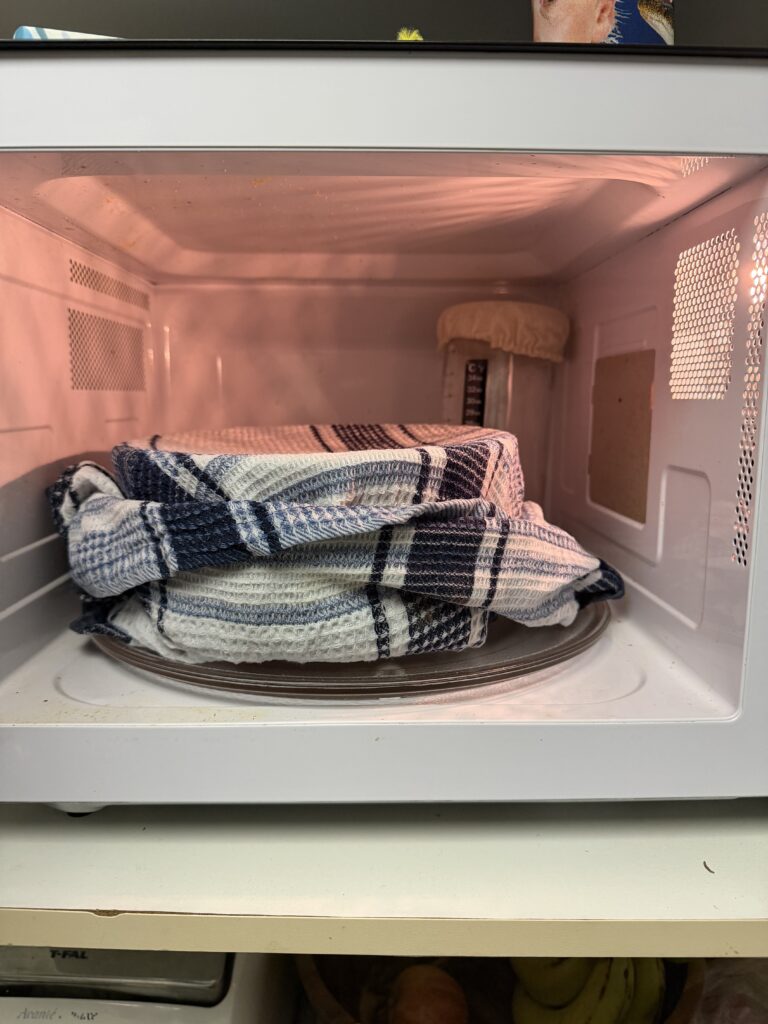
When I would leave my starter or dough to rest, I would keep it in the microwave with the door left open so the light inside stayed on. This is so the temperature stays consistent and warm (about 25˚ C).
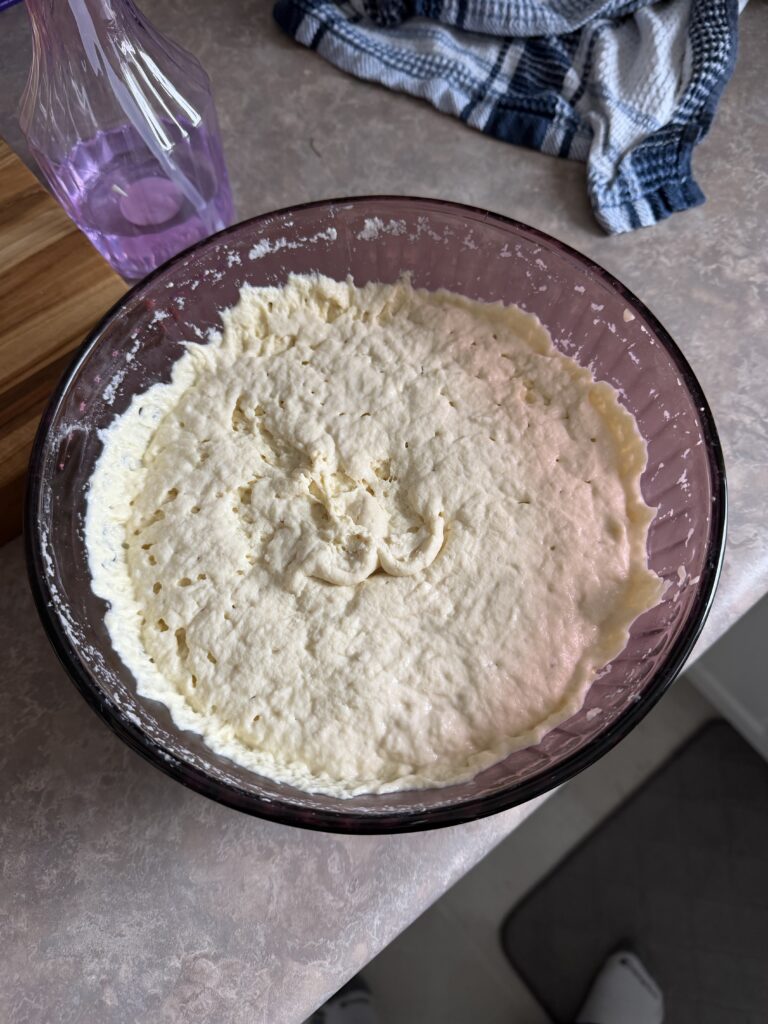
So after I fed my starter and it reached it’s peak, I measured out the ingredients for the bread which is 10 g of starter, 442 g of water, 11 g of salt, and 500 g of flour. The same recipe as before. Then after a good mix, I covered it in a damp tea towel and did 4 sets of stretch and folds. In between each stretch and fold I would leave it for 15 mins. Eventually it got a bit less sticky and then I left it covered until the next day!
The next day when I went to shape it, I see that my dough has expanded nicely however it had signs of over-proofing! Again!! With the poke test the indents didn’t spring back, it was very flat and sticky and it seemed to have risen over 50%. Frustrated because I didn’t want to bake a heavy dense bread again, I looked to instagram for support. Turns out, you can make focaccia bread with overproofed sourdough!
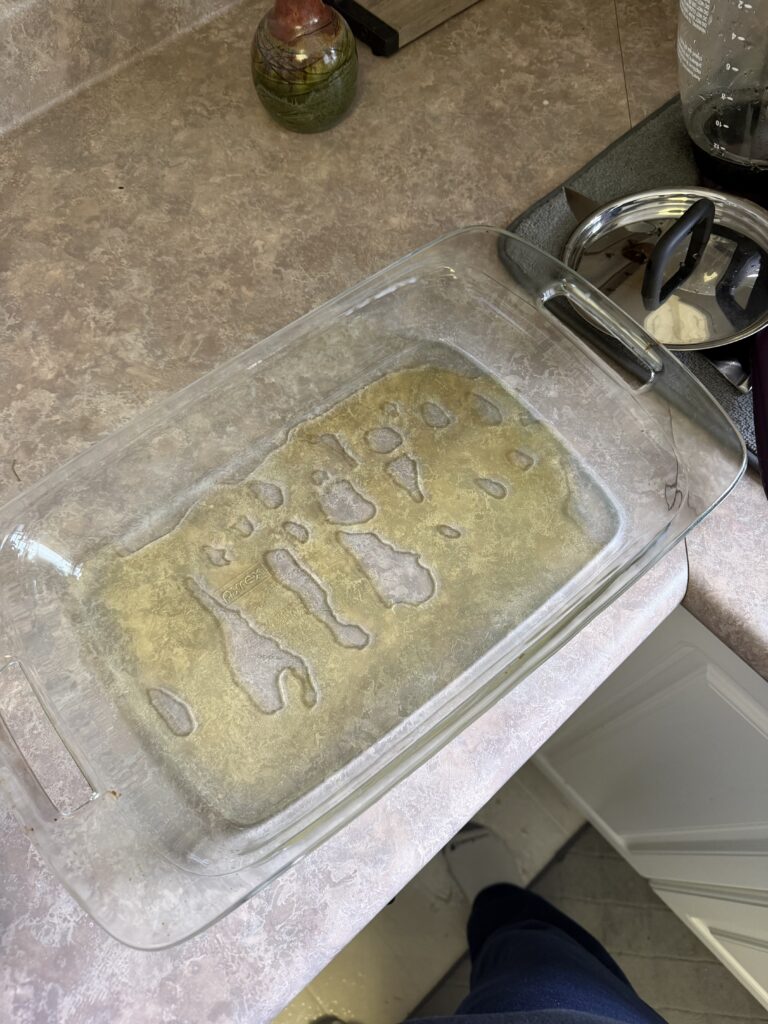
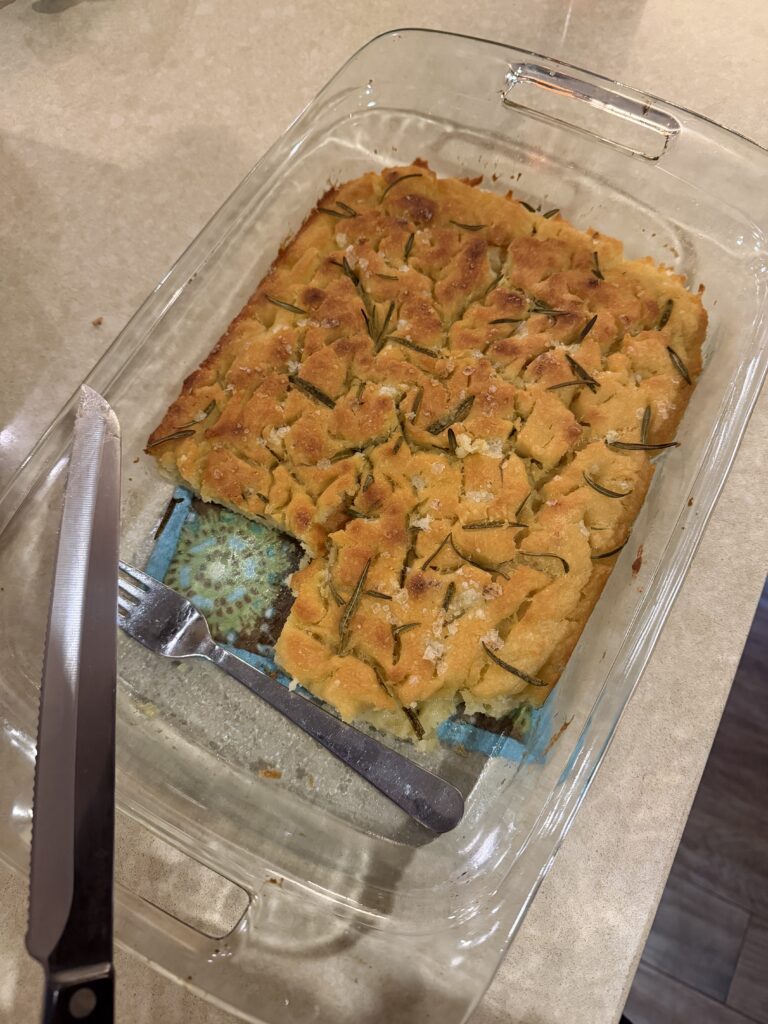
Spirits high again, I followed this recipe on pivoting to focaccia bread. I oiled my dish, spread out my dough, let it rest for just over 2 hours, then added more oil, did the dimpling, and added rosemary and flakey salt! When I took it out of the oven it looked so pretty and smelt so good I was so excited. It tasted okay… It was moist which was good and the rosemary and salt were super yummy but it was a bit sour (shocker).
I am happy with how this turned out! I am excited to try and make focaccia one day with a proper recipe and excited to try sour dough again….